
Pin Holder

Step 1 - to form the holder
Things you'll need: Tape holder (without the tape), cardboard circle (for base), padding and a piece of fabric
- Attach the cardboard circle to the tape holder with some glue (doesn't matter if you've measured and cut out your cirle before you attach it on the holder or if you attach the piece of cardboard first and then cut out your circle/base)
- Take a large, square piece of your fabric that you've chosen and lay it plain on your floor/desk
- Take a huge lump of your padding and put in the middle of the fabric square (and I mean take a HUGE lump - if you don't have enough padding your pins will have a problem to stand straight)
Step 2 - make a foundation
Things you'll need: Gesso/DP/Cardstock
- Depending on how you want your result and how you want to decorate your Pin Holder the foundation may vary (I chose Cardstock paper since I was going to glue a lot, and I didn't want that rough surface)
Step 3 - decorate
Things you'll need: Anything you like to decorate with/anything you have at home
- This last step is the step where you're free to use your imagination. Use whatever you like (I've used a lot of ribbons and laces for a romantic feeling, and also some pearl strings. I didn't want things to sprawl so much from my Pin Holder since I've limited craft space and therefore would be in my way)
*
*
*
Criss Cross Card
You'll need: Two cards, pen, glue and/or double sided tape, cardstock/DP and decorations.

Step 1: Draw a line diagonal from corner to corner like this (notice that the folding of the card is downwards)
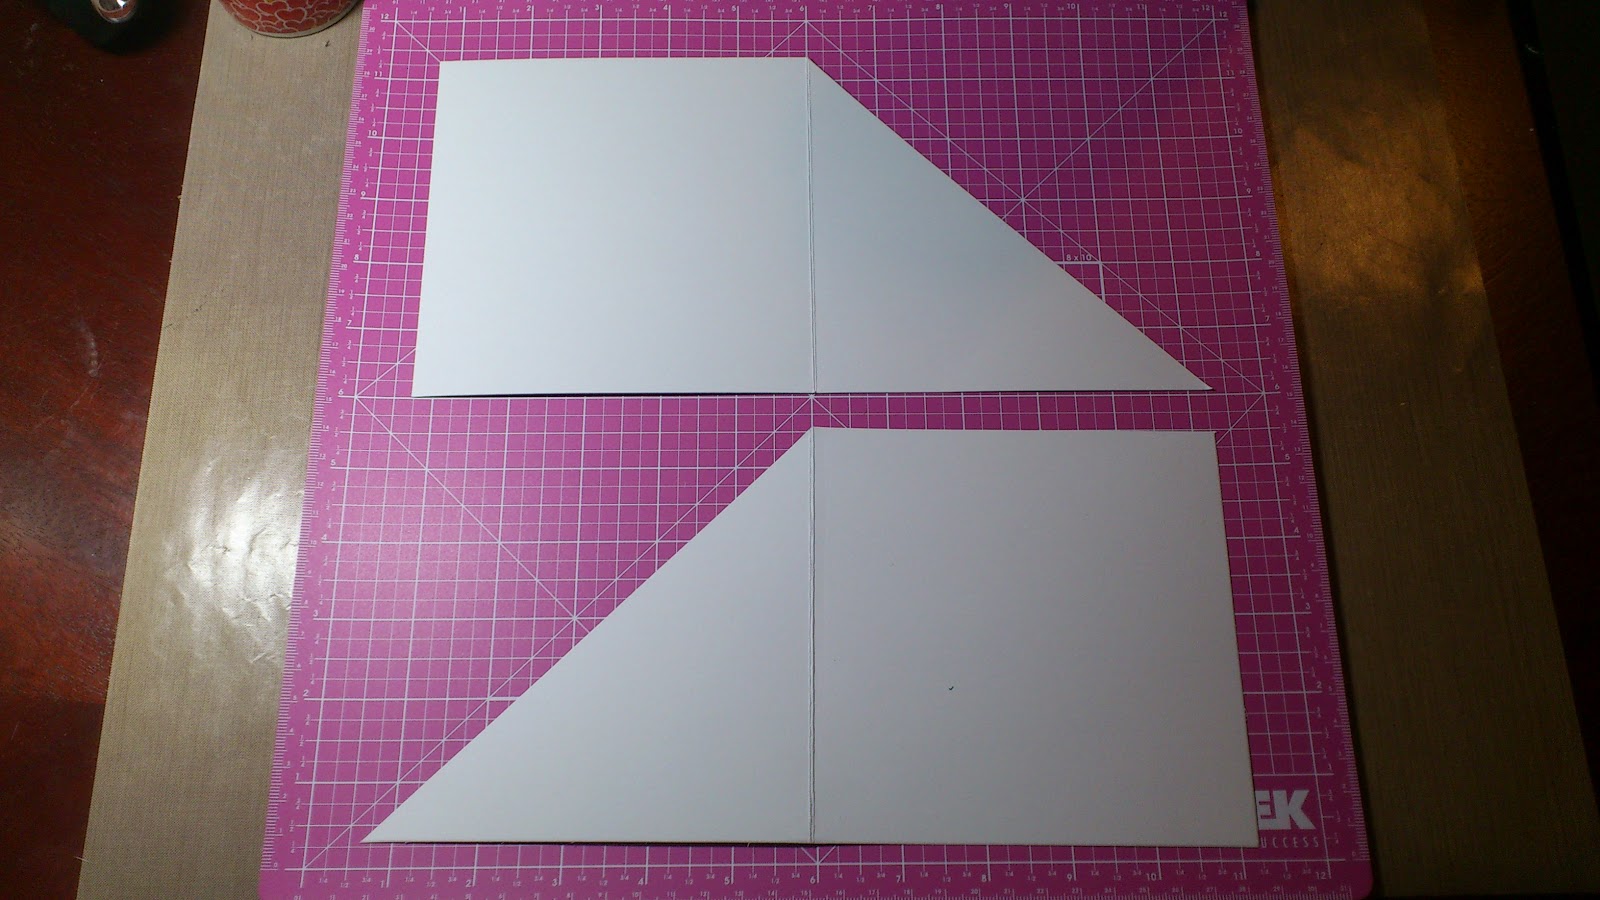
Step 2: Cut like the picture

Step 3: Put the paper with the folding upwards, glue/tape one of the square surface

Step 4: Put the two cards together like this

Step 5: Fold the "wings" in, one after the other
Notice that you'll have to do the paper decoration for the inside as well as the "wings" and glue that piece first before you fold and glue the "wings" (watch Step 7)
Notice that you ONLY glue along the bottom "wing"-line, otherwise you won't be able to put something inside your Criss Cross Card (you'll understand why further below)

Step 6: This is how it looks like folded (without paper pieces, not glued)

Step 7: Attach paper pieces (notice watch Step 5)

Step 8: Not finished, but you probably get the picture (notice that this one is glued)

Step 9: Finished

Step 10: Finished + showing what's hiding inside
*
*
*
Inga kommentarer:
Skicka en kommentar